How to install One Click Applications
One-Click Installer simplify the process of installing popular applications on your web hosting package.
In just a few clicks, you can deploy applications like WordPress, Joomla!, or Drupal without any technical expertise. This guide will walk you through the steps to utilize this convenient tool, allowing you to set up your desired applications quickly and efficiently. Whether you're a novice user or an experienced developer, our One-Click Installer makes application deployment hassle-free. Let's get started!
To install one of the abailable applications, follow these simple steps:
|
Step 1:
1. Login: Access the Client Area by clicking [here].
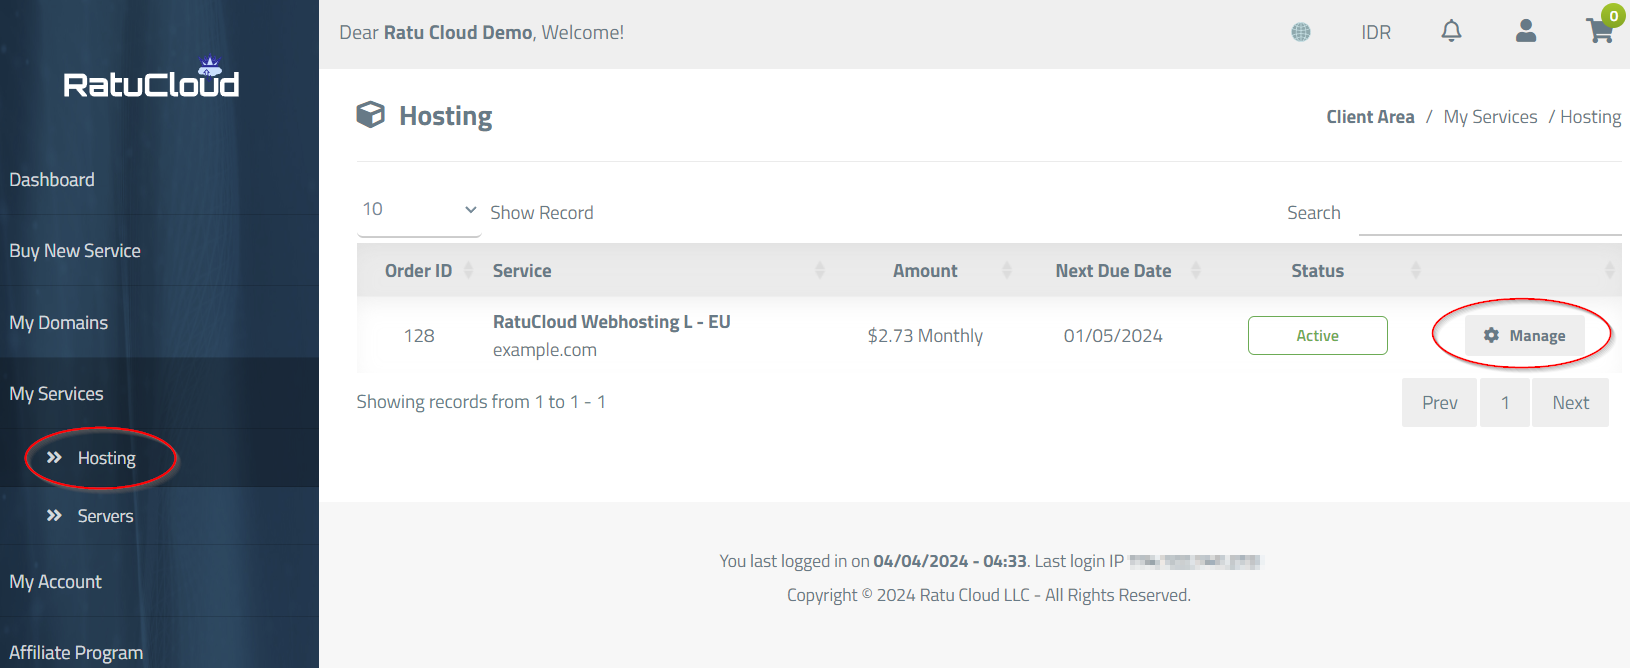
2. Navigate: In the left-side menu, click on "My Services" as shown in the picture.
3. Choose Hosting: Click on "Hosting."
4. Manage Web Hosting: Click on "Manage" on the right side of the Web Hosting package you want to install an application for. Only web hosting packages support one-click installers.
|
|
Step 2:
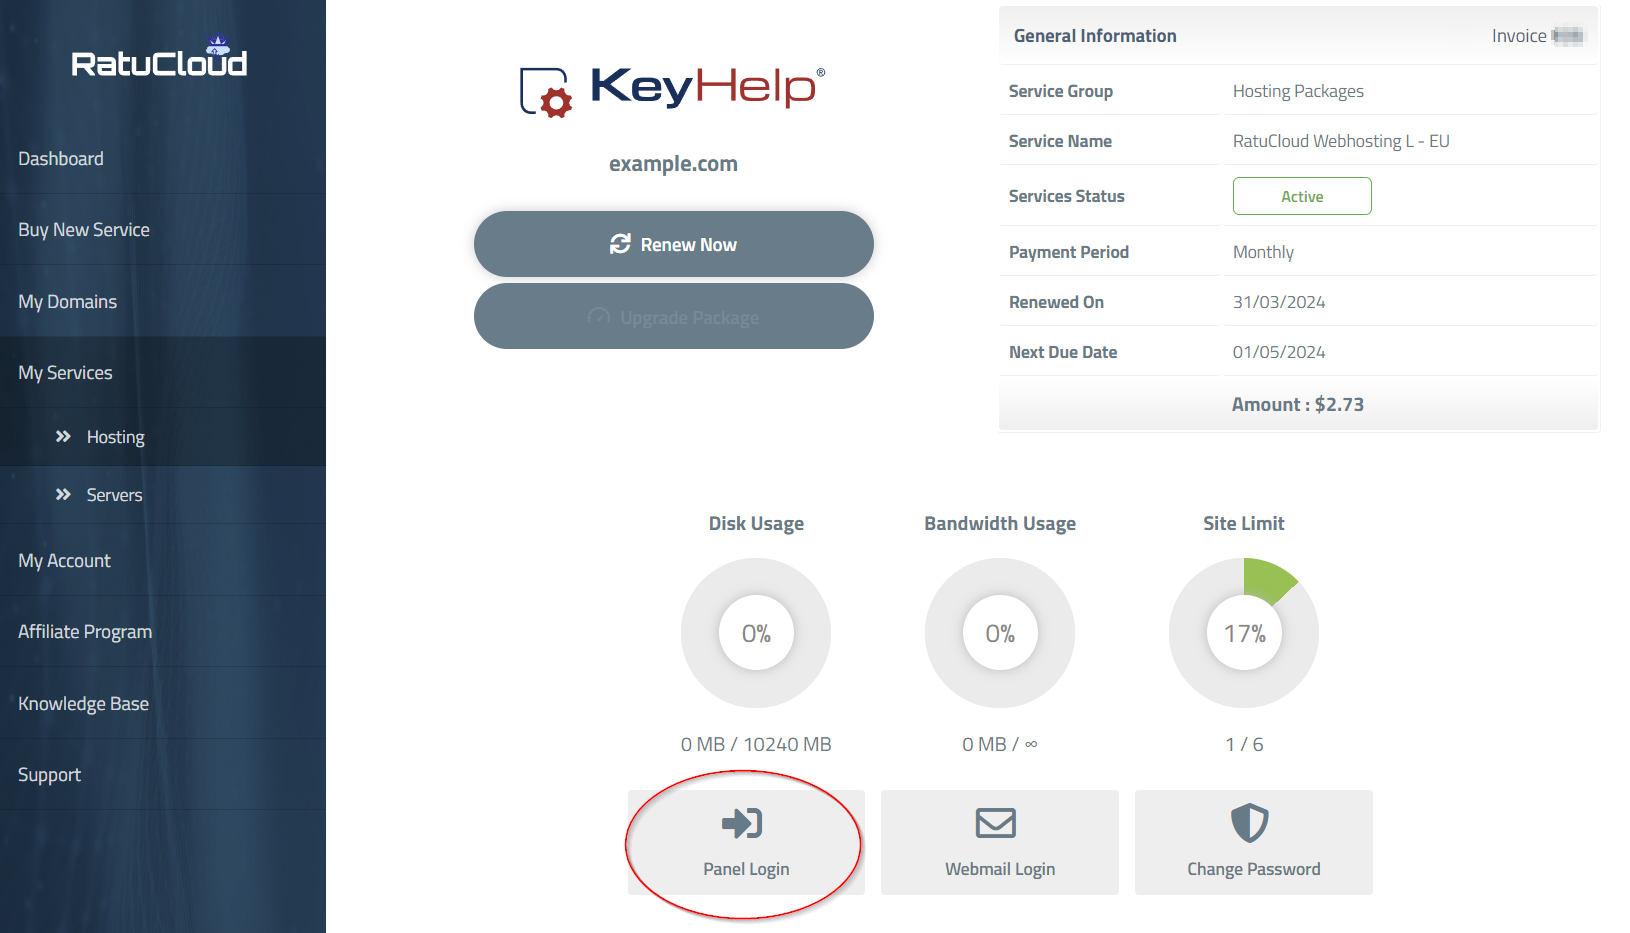
1. Access Control Panel: Now, you'll see useful information about your web hosting package, including the period, due date, storage usage, and more. Click on "Panel Login," as shown in the picture, to open the Web Hosting Control Panel in a new browser tab. For additional details about this panel apart from one-click installers, refer [here].
|
|
Step 3:
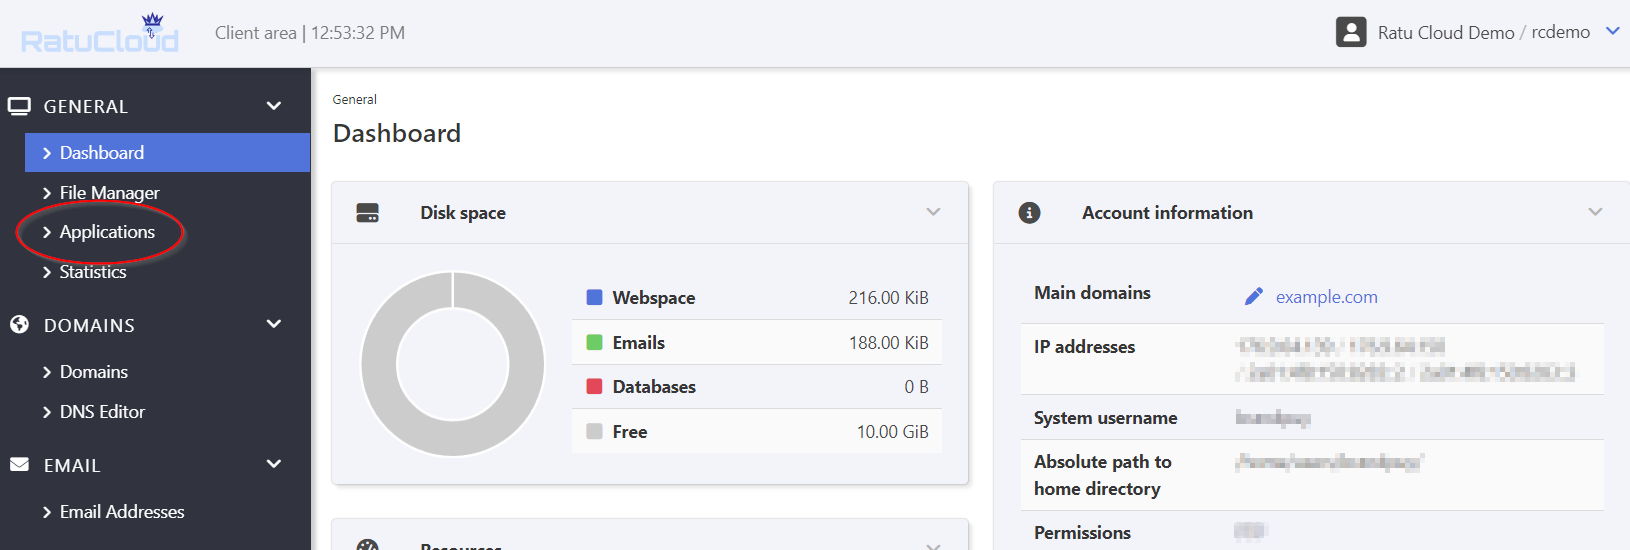
1. Access Applications: To access available applications, click on "Applications," as shown in the picture below.
|
|
Step 4:
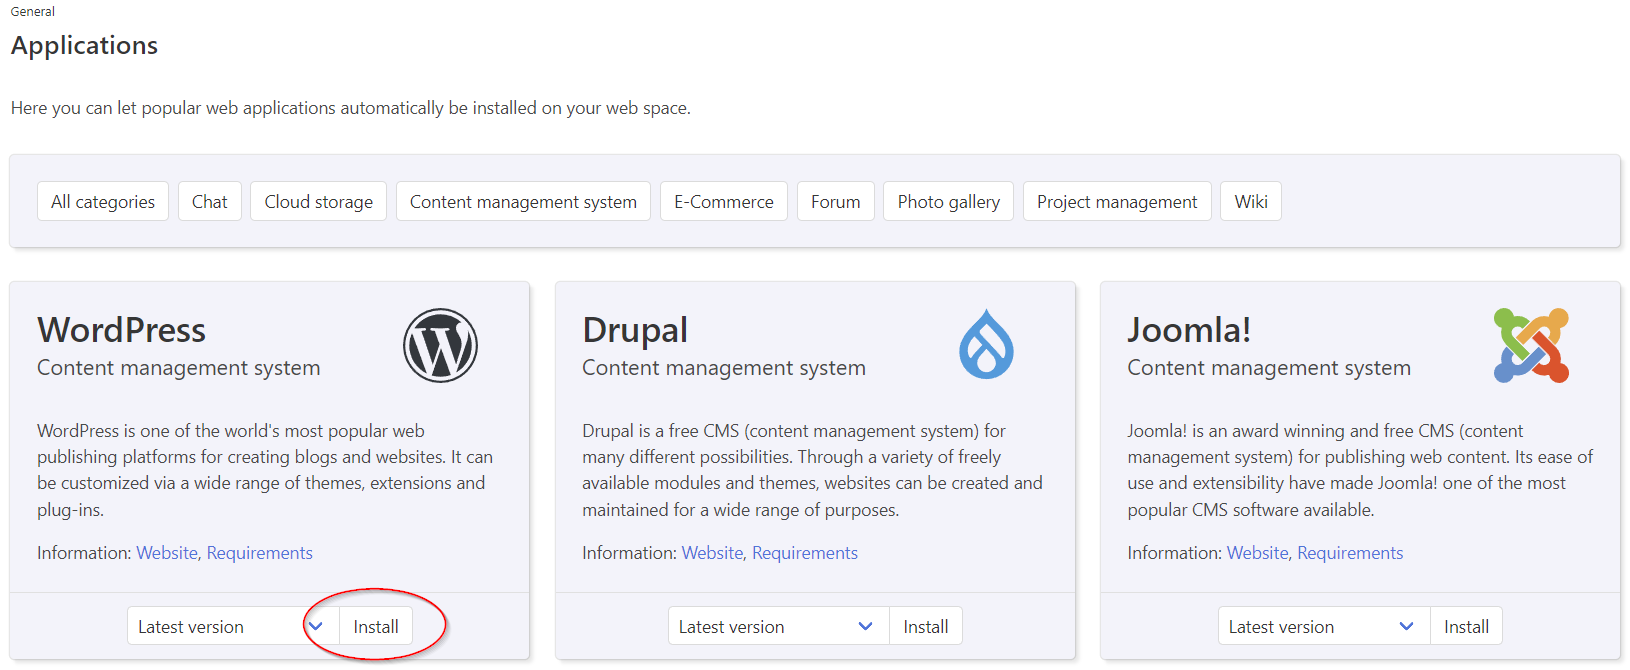
1. Choose Application: You'll find a list of all available applications for one-click installation. In this example, let's proceed with WordPress (all other applications work similarly). Choose the version you want to install and click "Install," as shown in the picture.
|
|
Step 5:
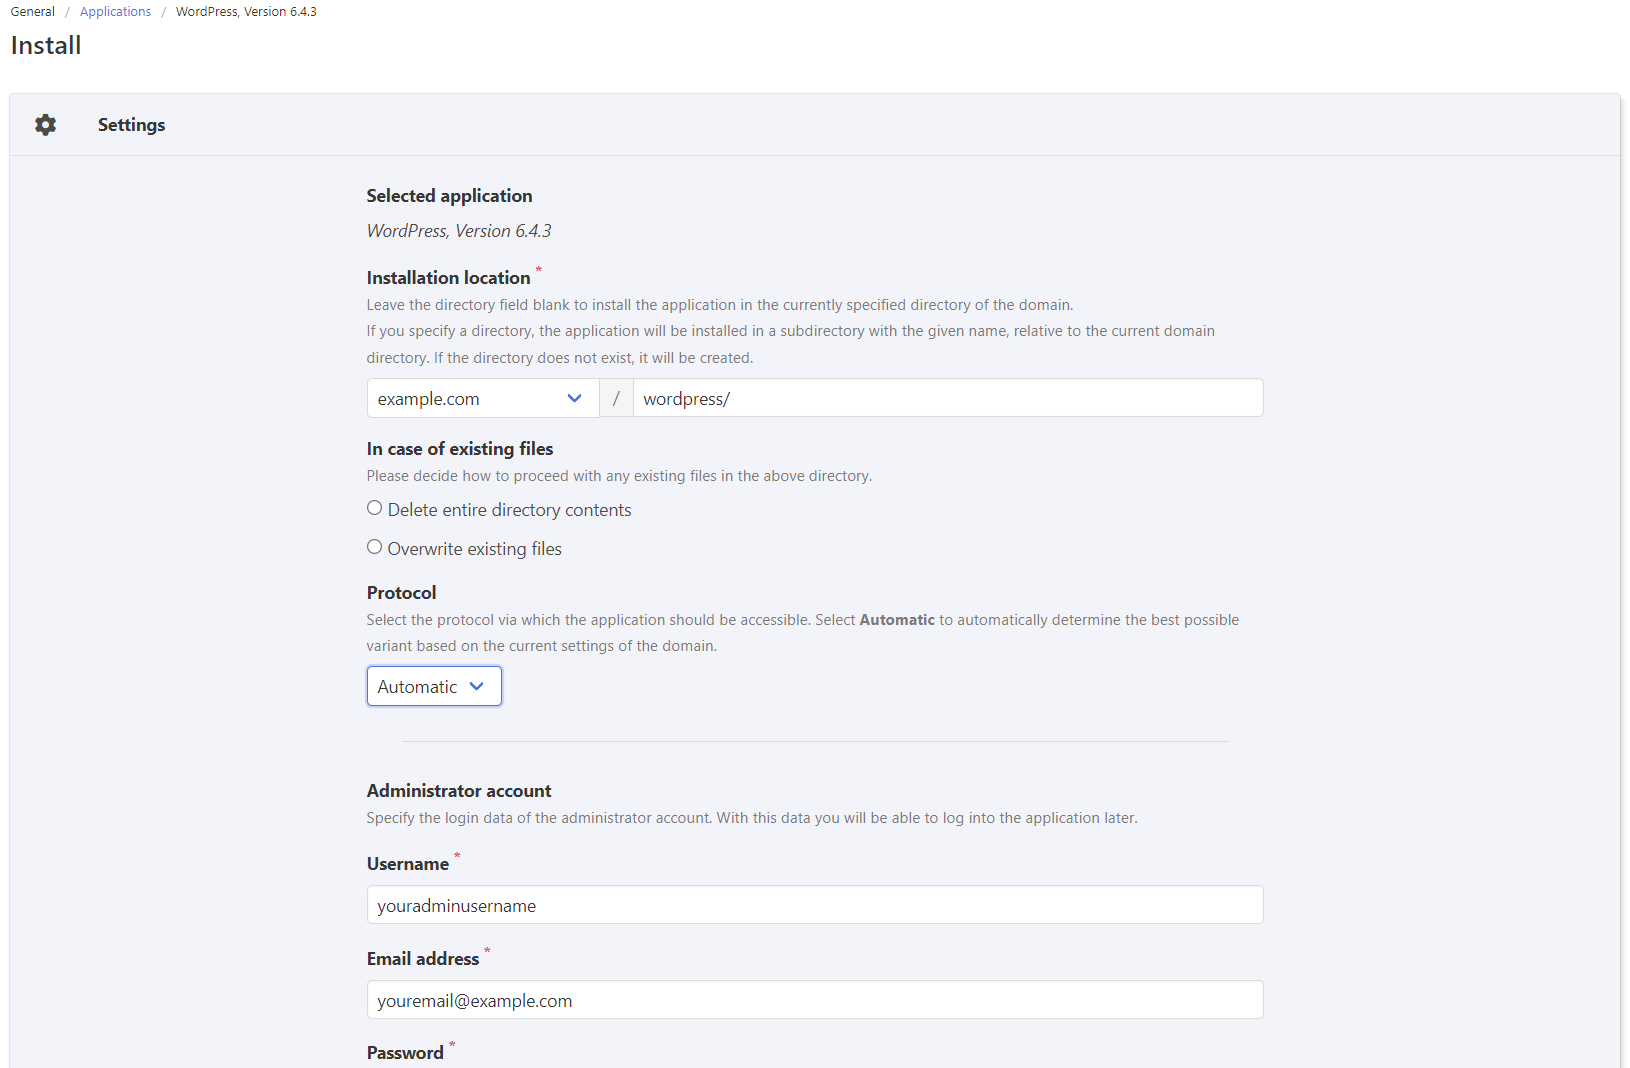
1. Fill Installation Form: Enter necessary information for installation. Choose the domain and folder for the application. If you leave the directory field empty, the application will be installed in your root directory. For example, if you choose "wordpress" as the folder name, the application will be accessible at "yourdomain.com/wordpress." Fill in other fields carefully (if you enter an invalid email address, you may will not be able to reset your password in case you loose it). After providing all information, click "Install."
|
|
Step 6:
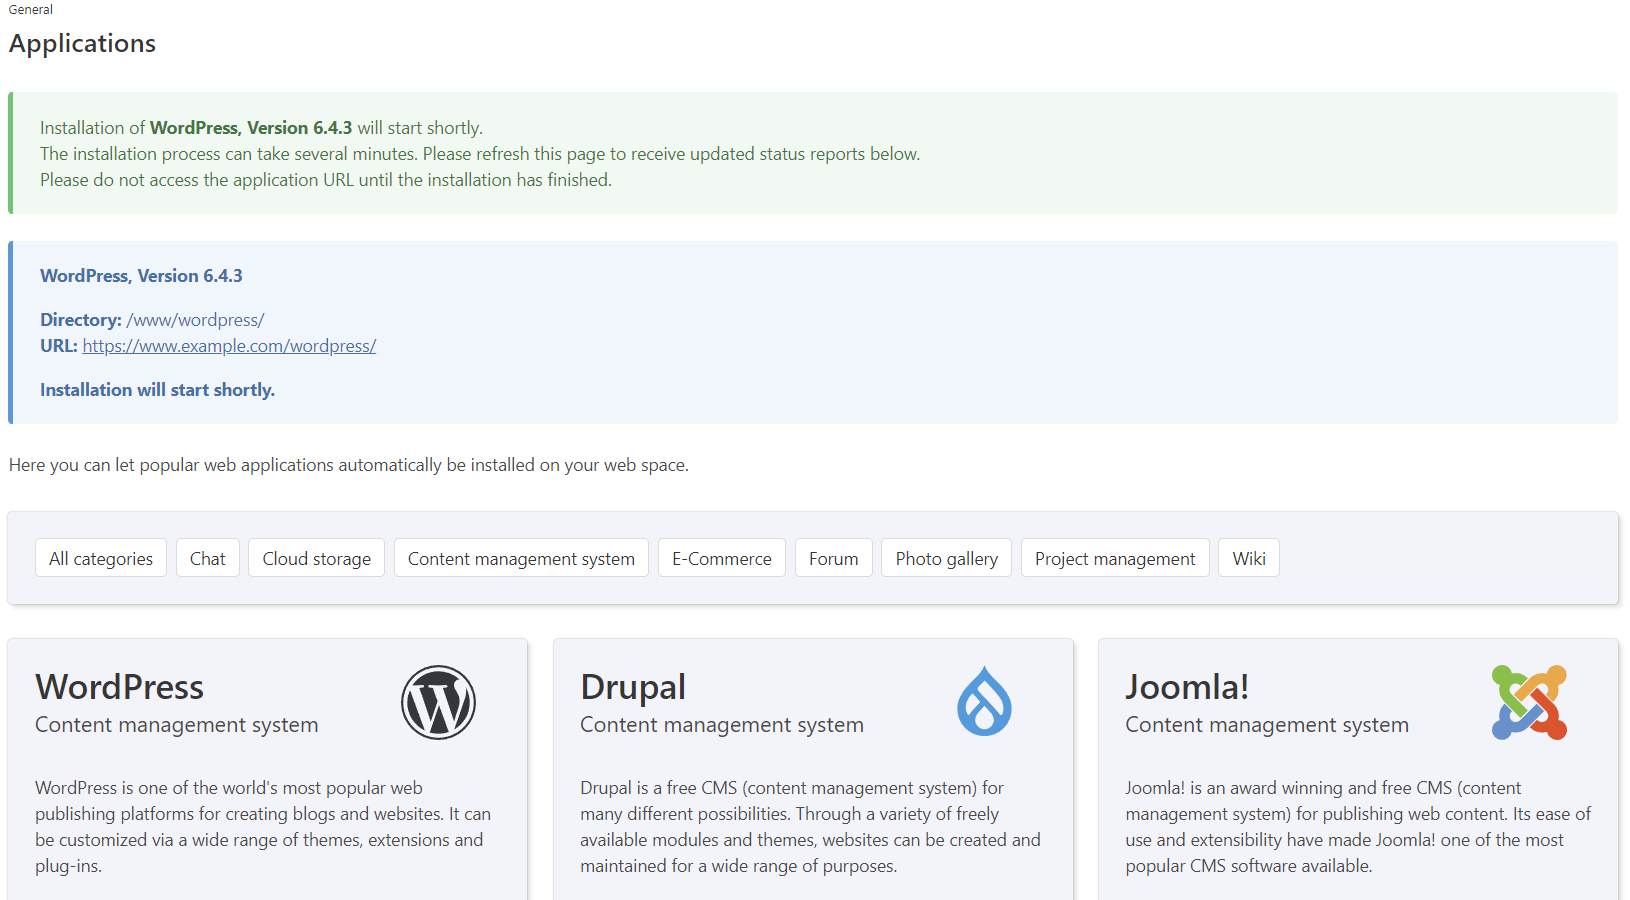
1. Wait for Installation: The installation process will start soon, as shown in the picture. Depending on the application, it may take a few minutes. Wait for 5 to 10 minutes before proceeding. Check the installation status by refreshing the page until you see the notification from Step 7. You can also already see the final URL for your application.
|
|
Step 7:
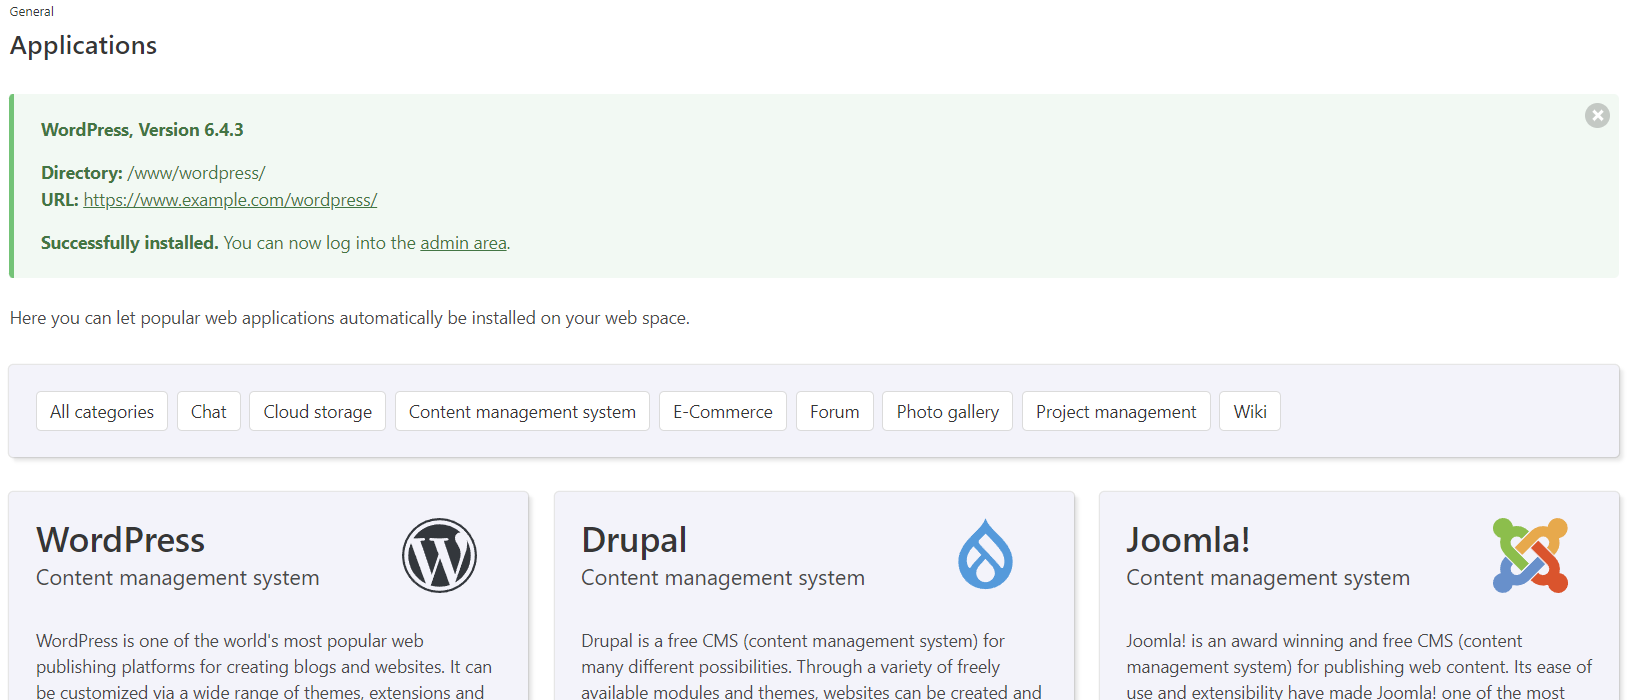
1. Installation Complete: Congratulations! The installation is finished. Clicking the URL will take you to the WordPress site (or your chosen application). You'll also see the link to the Admin area of your WordPress application. Log in and start creating your website or blog.
|
With these steps, you can easily install many applications via our hosting panel.
Link to all available applications.
Can't find the information you are looking for?
You have examined the knowledge base in detail, but you cannot find the information you need,
Create a Support Ticket
Thank you for your feedback.
Sorry about that :( We'll work to make it better.
You voted before.
(1410 times viewed / 0 people found it helpful)